How do you create fixed places for everything in your van?
A small van rarely becomes messy because you bring one large item too many. The chaos usually starts with dozens of small things that have no clear place.
By Laurens De Leeuw · 8 August 2026
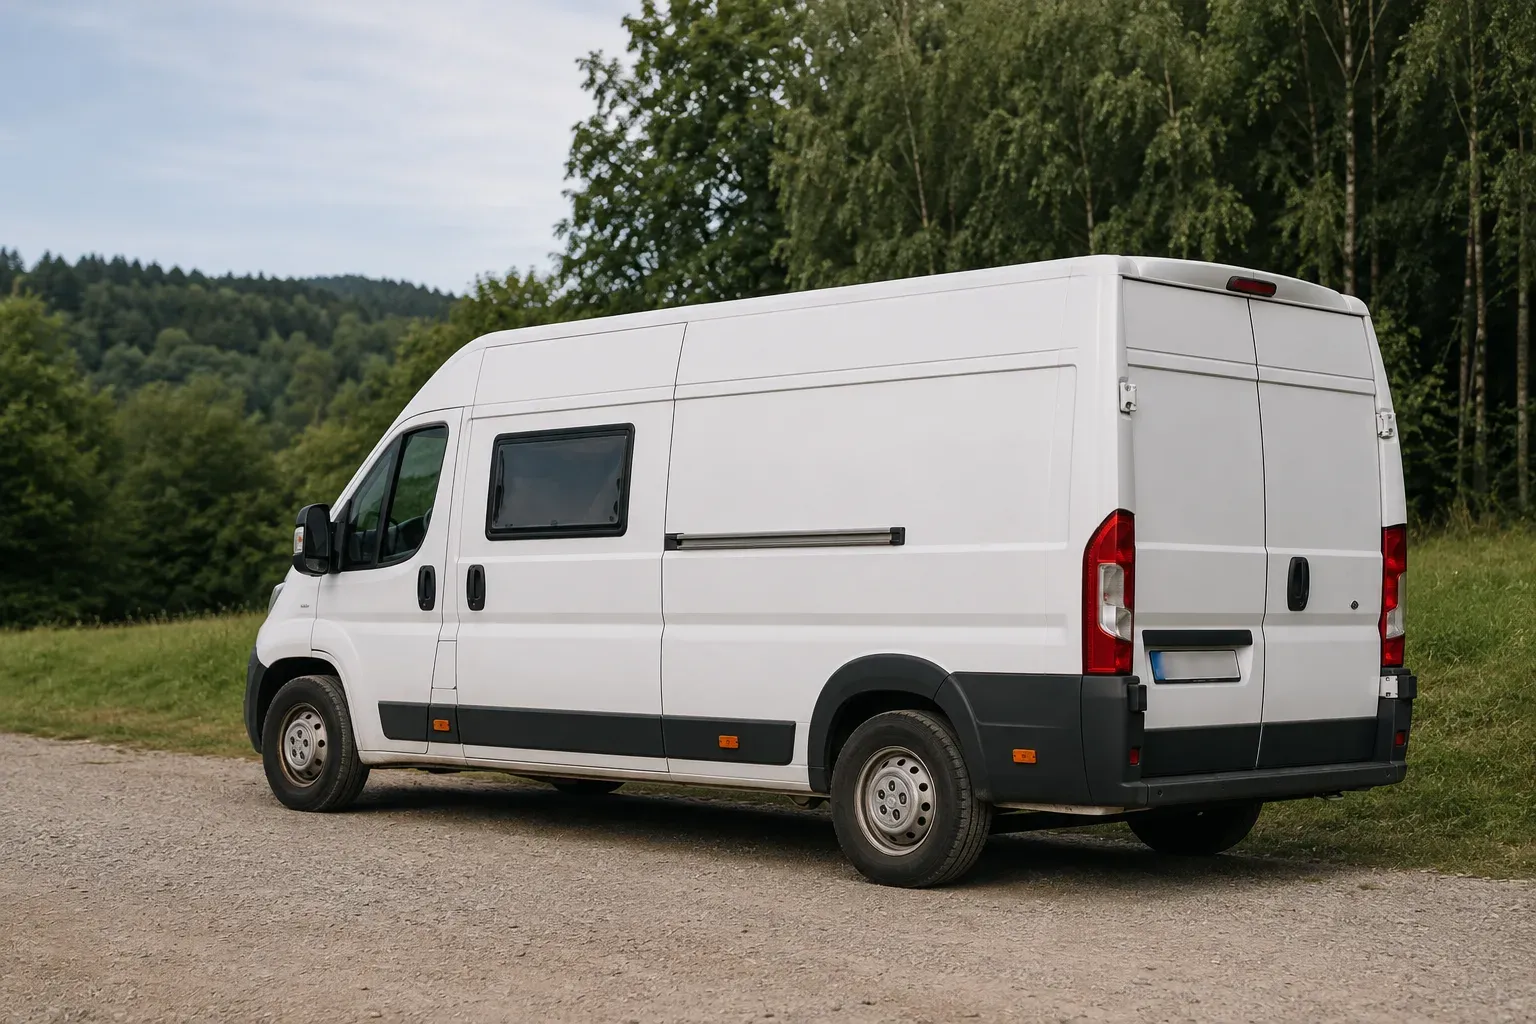
A small van rarely becomes messy because you bring one large item too many. The chaos usually starts with dozens of small things that have no clear place.
Your keys are on the kitchen counter one day and in your jacket the next. The charging cable moves between the bed, the cab and a random drawer. Wet shoes sit in the walkway, your toiletry bag is at the back, and before you can make coffee, you first have to open three storage boxes.
That tires you out on the road faster than you might think.
A fixed place for everything does not mean you need to build a separate wooden compartment for every item. Above all, it means you always know where something belongs, can reach it easily, and it stays safely in place while driving.
A good storage system works almost without thinking. You take something, use it and put it back in one movement. The fewer decisions you have to make each time, the calmer your van stays.
Start with your belongings, not with cabinets
The classic mistake is building a beautiful cabinet first and then trying to decide what should go in it.
Turn that around.
For a regular trip, gather everything you actually take with you:
- clothing
- shoes
- cooking equipment
- food
- water
- toiletries
- bedding
- electronics
- tools
- safety equipment
- camping chairs
- dog supplies
- equipment for hobbies or work
Then divide everything into logical categories.
You will quickly notice which categories need a lot of space, which items you use every day and what hardly needs to come along at all.
Only once you have that overview can you design useful storage spaces.
Building a cabinet for things you leave at home after three trips is wasted space and weight.
Think in zones
A van stays much more organised when you do not think of a place for every individual item, but first create larger zones.
A practical basic layout could be:
- entrance and dirty zone
- kitchen and food
- clothing
- sleeping
- toilet and hygiene
- electronics and work
- technical systems
- tools and emergency equipment
- outdoor equipment
- temporary storage space
Within each zone, individual items can then get their fixed place.
You then know, for example, that everything for coffee is in the kitchen zone, all charging cables belong with the electronics, and wet items never end up next to your clean clothes.
The entrance zone: stop dirt at the door
The sliding door is usually the best place for everything that is wet, dirty or needed daily when you come in.
Create a fixed place there for:
- shoes
- jacket
- rain gear
- towel
- dog lead
- poop bags
- small brush
- rubbish bag
- slippers
- possibly an umbrella
This can be very simple:
- low plastic box
- rubber mat
- a few sturdy hooks
- small net or wall pocket
- narrow shoe drawer
The most important thing is that wet shoes and jackets do not first have to travel through the entire van.
With Grephar, for example, I would always provide the same hook for his lead and the same place for his towel by the door. It may seem like a small detail, but when you come in with wet dog paws, you do not want to start searching first.
Give daily items the easiest places
Not everything needs to be equally accessible.
Use this simple rule:
> The more often you use something, the fewer actions should be needed to reach it.
Daily items should preferably be accessible without having to:
- lift a mattress
- remove another box
- step outside
- open three cabinet doors
- crawl around on your hands and knees
Think of:
- water bottle
- coffee supplies
- everyday clothing
- toothbrush
- phone charger
- torch
- keys
- toilet paper
- dog lead
- rubbish bags
Spare parts, seasonal clothing and extra supplies can be further away or at the back under the bed.
Use the one-movement rule
A fixed place works best when you can take and put back an item in one simple movement.
Good example:
You open one drawer and take out your cutlery.
Less good example:
You lift a seat cushion, remove a crate, open that crate and take out a smaller box to get one spoon.
That second solution may look space-efficient on paper, but in daily use you will probably leave the spoon somewhere because putting it back takes too much effort.
Use the one-movement rule especially for items you need several times a day.
Give items that are “in use” a place too
Many storage systems only work when everything is neatly put away. But on the road, there are always items you are using temporarily.
Think of:
- a worn jumper
- phone that is charging
- open book
- water bottle
- wet towel
- shoes
- rubbish
- groceries that have not been put away yet
So provide temporary places too.
For example:
- one hook for worn clothing
- one small charging station
- one compartment for phone, wallet and keys
- one free corner for groceries
- one drying spot for wet textiles
- one small catch-all box for temporary clutter
Without these in-between places, everything automatically ends up on the bed or kitchen counter.
Create a fixed landing spot
A landing spot is a small compartment where you immediately put your everyday loose items when you come in.
Think of:
- keys
- wallet
- phone
- sunglasses
- parking ticket
- earbuds
- small torch
This can be a shallow tray, small wall pocket or drawer next to the door.
Keep this place deliberately small. Otherwise, it quickly turns into a general junk drawer full of batteries, receipts, cables and items nobody knows where they belong.
A landing spot is for things you need again that same day, not for everything you have not yet found a better solution for.
The kitchen: group by task
A kitchen stays more organised when you group items according to what you do with them.
Coffee and breakfast
Store together:
- coffee or tea
- mugs
- coffee-making equipment
- sugar or milk powder
- breakfast products
Cooking
Store together:
- cooking pot
- pan
- spatula
- knife
- chopping board
- oil and herbs
- lighter
Eating
Store together:
- plates or bowls
- cutlery
- napkins
- drinking cups
Washing up
Store together:
- washing-up liquid
- sponge
- cloth
- drying towel
- grey-water equipment
This way, you do not have to go through three different cabinets to make one meal.
A shallow drawer works well for cutlery and small cooking items. Food can go in a cabinet or a few boxes. Large pots often fit better in a simple lower compartment than in a heavy custom drawer.
Create one pantry zone
Spreading food throughout the van almost guarantees forgotten packages and duplicate purchases.
Preferably use one clear pantry zone.
You can divide it into:
- breakfast
- dry food
- snacks
- drinks
- herbs and spices
- reserve supplies
Put new products at the back and use older products first. This prevents an opened package from sitting somewhere at the back of a cabinet for months.
Keep daily snacks and drinks somewhere easily accessible on the road. During a short stop, you do not want to open the entire rear garage for one biscuit or bottle of water.
Water always gets the same place
Loose water containers must be firmly secured and must not slide through the van during a corner or emergency stop.
Place them:
- low down
- close to where they are used
- in a suitable compartment
- with an edge, strap or other solid restraint
- away from vulnerable electronics
Do you use different types of water? Make the distinction clear.
For example:
- drinking water
- reserve water
- water for washing
- waste water
Keep the caps, filling hose and any water filter together with the water system. Otherwise, you will be searching for everything again at every filling point.
Clothing: clean, worn, dirty and wet
For clothing, you actually need at least four fixed places.
Clean clothing
In a cabinet compartment, drawer or soft storage bag.
Worn but still usable
On one hook, in an open basket or separate compartment.
Dirty laundry
In a breathable laundry bag.
Wet clothing
In a drying spot with air circulation.
Do not throw worn clothing back in with the clean laundry. And do not put it on your bed every evening either.
With these four simple categories, your clothing stays organised for much longer.
If there are several travellers, give each person their own clothing compartment or bag. Anything that does not fit in the allocated space stays at home.
Bedding needs somewhere to go during the day
With a fixed bed, this is simple: your bedding can largely stay in place.
With a convertible bed or pull-out bed, you need a fixed place for:
- pillows
- duvet or sleeping bags
- fitted sheet
- mattress topper
- loose mattress sections
Plan that place before building the bed system.
A convertible bed saves little space if your duvet and pillows occupy the entire bench during the day.
For example, use:
- large, light cabinet compartment
- fabric storage bag
- space behind a backrest
- ventilated compartment under a bench
Do not pack damp bedding tightly into a closed box. Let it air out first.
Toilet and hygiene must remain accessible at night too
A toiletry bag deep under the bed may not seem like a problem during the day. Until you want to brush your teeth in the evening and first have to dismantle your entire sleeping area.
Keep daily hygiene items together:
- toothbrush
- toothpaste
- soap
- deodorant
- medication
- hand sanitiser
- toilet paper
- small flannel
- towel
A removable toiletry bag often works well. You can take everything with you at once to a campsite shower, swimming pool or sanitary building.
The toilet itself must also remain accessible when the bed is set up. A compact toilet hidden under three crates is not a practical solution.
Create one charging station for electronics
Cables spread through a van remarkably quickly.
So create one fixed charging zone with:
- USB or USB-C ports
- phone spot
- power bank
- laptop charger
- router or hotspot
- small cable compartment
- possibly a power socket
Only keep cables that belong to the devices you have with you.
Use short cables where possible and label similar ones. A small elastic band or cable tie prevents everything from turning into one knot.
You can provide a second simple charging point by the bed, but avoid having every wall covered in ports and loose cables.
Technical systems need a fixed and accessible place
Battery, fuses and water pump should be out of sight, but not behind a permanently closed wall.
Provide a technical zone for:
- leisure battery
- main switch
- fuse box
- busbars
- charge controller
- inverter
- water pump
- shut-off valves
- heating
- technical documentation
Make this zone accessible through a door, drawer or screwed inspection panel.
Do not store technical components together with clothing, loose metal tools or leaking liquids.
Take photos of cable routes and label fuses and pipes. That way, you will still know later what goes where.
Tools and emergency equipment are not the same
Tools can be stored at the back in a sturdy low box. Emergency equipment needs to be more quickly accessible.
Tools
For example:
- screwdrivers
- pliers
- spanner set
- spare parts
- tape
- cable ties
- multimeter
Emergency equipment
For example:
- high-visibility vest
- first-aid kit
- torch
- fire extinguisher
- warning triangle
- documents
- emergency medication
Do not put safety equipment underneath all your luggage.
If there is a problem by the roadside, you do not want to unload half the garage before reaching your high-visibility vest or warning triangle.
Keep outdoor equipment accessible from outside if possible
Items you use outdoors are best stored close to a rear door or sliding door.
Think of:
- camping chairs
- table
- power cable
- filling hose
- hiking shoes
- levelling blocks
- cycling equipment
- outdoor shower
- cleaning equipment
This way, you do not have to carry them through the living area.
Under a fixed bed, for example, you can create a rear garage zone with crates or low compartments that are directly accessible through the rear doors.
Do not store daily indoor items exclusively in this outdoor zone. In bad weather, it is annoying to have to go outside for every small task.
Decide in advance which side you need to access something from
A storage compartment can be accessible:
- from the living area
- through the sliding door
- through the rear doors
- from both sides
Decide this based on how it will be used.
Examples:
- you usually want to access clothing from inside
- camping chairs can go at the back
- shoes belong by the sliding door
- tools can go at the back
- coffee must be accessible from inside
- the water connection can be by the door or kitchen
- safety equipment belongs close to the cab or exit
A large storage compartment under the bed is less useful if you can only reach all your daily items through the rear door.
A fixed place does not have to be a fixed cabinet
This distinction is important.
A loose crate can perfectly well have a fixed place when it:
- always sits in the same compartment
- fits exactly
- cannot slide while driving
- is clearly used for one category
So you do not need to build everything in.
Crates and removable boxes are useful because you can:
- clean them
- use them outside
- rearrange them easily
- take them out of the van
- replace them later
In an officially registered camper, the living equipment must be securely fixed, and doors and drawers must remain closed during sudden manoeuvres. Loose contents and removable boxes must of course also be safely secured while driving.
For example, use:
- fitted compartments
- raised edges
- tie-down straps
- retaining battens
- non-slip material as an addition
- sturdy cabinet latches
A non-slip mat alone is not enough for a heavy crate that could slide forwards during an emergency stop.
Place heavy items low down
Heavy objects belong as low as possible in the van.
Think of:
- water
- tools
- battery
- gas bottle
- food supplies
- heavy cooking pots
- spare parts
Overhead cabinets are better for light items such as:
- towels
- clothing
- toilet paper
- light food
- empty bags
Placing heavy objects high up affects stability and makes the consequences worse if a cabinet or latch fails.
Also distribute weight between left and right, and do not put everything all the way at the back.
Do not build a custom compartment for every item
A custom compartment for exactly one device looks neat. But as soon as you replace that device, nothing fits anymore.
Use custom solutions mainly for:
- battery
- gas bottle
- water tank
- fridge
- safety equipment
- technically necessary components
For everyday items, adjustable shelves, boxes and flexible compartments are usually smarter.
Your travel habits change. You may buy a different cooking pot, take a dog along later or start working on the road.
A storage system should be able to handle some change.
Use labels only where they really help
Labels can be useful for boxes and technical zones.
For example:
- electrics
- tools
- reserve food
- dog
- first aid
- winter
- toilet
But do not label every small compartment.
A good system should be largely logical without having to read every label.
Use labels mainly for:
- identical closed boxes
- items you rarely use
- fuses and cables
- equipment that several people need to find
- emergency supplies
Deliberately keep one place empty
This may sound contradictory in a small van, but empty space is essential.
There are always temporary items on the road:
- groceries
- wet jacket
- parcel
- extra drinking water
- rubbish
- items that need drying
- something you buy along the way
If every compartment is already completely full before departure, everything that is added immediately ends up on the bed or in the walkway.
So provide:
- one empty crate
- one free floor corner
- one open cabinet compartment
- part of the garage that is not permanently filled
That is not wasted space. It is the buffer that keeps your system usable in real life.
Create a driving mode and a living mode
Some items have a different place when parked than when driving.
A water bottle can sit on the table when you are parked, but belongs in a holder while driving. A laptop can be in use on the worktop, but must be stored away before departure.
So make clear arrangements:
Living mode
- daily items may be in their place of use
- wet clothing is hanging to dry
- table is set up
- bedding is open
Driving mode
- cabinet doors and drawers closed
- loose items stored away
- table secured
- heavy boxes strapped down
- cooking equipment put away
- laptop stored away
- drinking bottles in holders
- walkway and cab clear
The simpler the transition from living mode to driving mode, the more likely you are to do it consistently.
Use a departure basket
A small departure basket can be useful for items that need to be checked or stored before every drive.
Think of:
- keys
- phone
- charging cable
- sunglasses
- parking ticket
- wallet
- roof hatch remote control
- small notebook
Before leaving, check the basket and put it in its fixed driving place.
Keep this system small, though. It should not become another general clutter box.
The five-minute reset
Even the best system does not keep itself tidy.
Take five minutes every evening or morning to:
- sort clothing
- put away washing up
- collect rubbish
- roll up cables
- put shoes by the door
- clear the table
- hang out wet items
- put daily items back
In a small space, five minutes makes an enormous difference.
If you wait three days, you first have to tidy up for half an hour before you can move around normally again.
Do a system check after every trip
When you get home, do not only look at what is dirty, but also at what did not work well.
Ask yourself:
- What could I never find?
- Which items were always on the bed?
- Which cabinet was difficult to access?
- Which box did I never open?
- What rattled while driving?
- Which daily items were stored too deeply?
- Where did moisture or dirt build up?
- What took up too much space?
- Which fixed place did I use automatically?
Then adjust your layout.
Do not immediately build a new cabinet for every small problem. Sometimes the simplest solution is a different box, hook or category.
Test three trips before making everything permanent
At the beginning, provide as much modular storage as possible:
- crates
- screwed shelves
- movable boxes
- temporary hooks
- adjustable compartments
Use the system for at least a few trips.
Only then should you consider building permanent drawers or custom cabinets.
The place that seems perfect for your clothing during the build may turn out to make much more sense for food on the road. A drawer you built for tools may become your best everyday kitchen drawer.
Experience is more valuable here than a perfect drawing.
A practical example for a small van
For a compact van, this system can already be enough:
By the sliding door
- shoe box
- two hooks
- dog towel
- small rubbish compartment
Under the bench seat
- clothing crate
- kitchen crate
- toilet and hygiene
- compact toilet
At the back
- tool box
- camping chairs
- power cable
- reserve water
Above or on the wall
- light net for towel
- small compartment for books
- charging station
- torch
By the cab
- documents
- sunglasses
- wallet
- high-visibility vest
- keys
In a small van, more fixed furniture is often not necessary.
A practical example for a medium-sized or large van
In a larger van, you can create clearer zones.
Kitchen unit
- drawer for cutlery and cooking utensils
- lower cabinet for pots
- pantry cabinet
- drinking water and pump
Bench seat
- everyday clothing
- toiletries
- electronics
Overhead cabinets
- light clothing
- towels
- toilet paper
- light food
Rear garage
- camping equipment
- cycling equipment
- tools
- reserve supplies
- dirty or wet outdoor items
Technical compartment
- battery
- fuses
- chargers
- water shut-off valves
- documentation
Even in a large van, it is wise not to build out every available corner.
Common mistakes
Everything in one large clutter box
You have plenty of volume, but cannot find anything.
Storing daily items too deeply
As a result, they are left everywhere after use.
No place for worn clothing
The bed automatically becomes the clothes chair.
No wet zone
Moisture spreads through the entire van.
Keeping no free space
Every grocery shop immediately creates chaos.
Buying too many small organisers
You end up with more containers than belongings and no longer know what belongs where.
Hiding technical systems behind fixed panels
Neat until a fuse blows or something leaks.
Testing only while parked
A compartment that works well at home can rattle or spring open while driving.
Stacking safety equipment at the bottom
In case of trouble, it needs to be immediately accessible.
Building a system that requires too much discipline
If putting something back takes five actions, you will stop doing it after a few days.
Quick checklist for every fixed place
For every item or category, ask yourself:
- How often do I use this?
- Which side do I need to access it from?
- Can I take it in one movement?
- Can I put it back just as easily?
- Is it secure while driving?
- Is it heavy and therefore stored low down?
- Can it get wet or dirty?
- Does it need to remain accessible when the bed is set up?
- Will it still fit if I replace it later?
- Does this place really need a cabinet, or is a box or hook enough?
If you can answer those questions, a logical layout usually emerges naturally.
The best fixed place feels obvious
A well-organised van does not have to be perfect or empty.
A jacket, water bottle or book can certainly be visible when you are using it. The goal is not for your van to look like a showroom at every moment.
The goal is for everything to be able to return to a logical place without much effort.
Start with zones. Keep daily items close by. Place heavy items low down. Make technical systems accessible. Provide a dirty zone, a temporary landing spot and deliberately leave some empty space. Test your system on real trips and only then build permanently.
Ultimately, the best fixed place is the one where you automatically put an item back without thinking about it.
When that works for almost everything in your van, you have far less to search for, move around and tidy up.
And then even a small van suddenly feels much bigger.
Sources
https://www.vlaanderen.be/mobiliteit-en-openbare-werken/auto-en-motor/uw-voertuig-verbouwen-of-wijzigen/uw-voertuig-ombouwen-naar-een-kampeerwagen
https://www.wegcode.be/nl/nieuws/uw-voertuig-laden-voor-vertrek~abekklzkxp
https://www.politie.be/5913/nieuws/persbericht-resultaten-van-onze-controleactie-ladingzekering
# How do you create fixed places for everything in your van?
A small van does not become messy because you necessarily have too much stuff. It mainly becomes messy when things have no clear place.
Your jacket ends up on the bed. The phone charger is somewhere among the cooking supplies. The torch disappears into a backpack. Wet shoes are in the walkway, and every time you want to make coffee, you first have to move three other things.
At that point, you do not necessarily need more cabinets. You need a better system.
A fixed place means you know without thinking where something is and where to put it back after use. That sounds simple, but in a van, that place also needs to remain accessible, safe and logical while driving, sleeping, cooking and living.
The goal is not for your van to look perfectly tidy at every moment. The goal is for tidying up to happen almost automatically.
Do not start building compartments and cabinets straight away
Before placing boxes, drawers and hooks everywhere, you first need to know which things you actually use.
Many beginners design a complete storage layout while their van is still empty. As a result, theoretical items get a nice place, while everyday objects later fit nowhere logically.
So use your van a few times first with a temporary setup.
Take boxes with you and see what happens in practice:
- Where do you automatically put your keys?
- Where do you take off your shoes?
- Where does your jacket end up?
- Which things do you search for every morning?
- What do you use while cooking?
- Where is your phone while sleeping?
- Which things remain untouched for three days?
- What is constantly in the way?
- Where does clutter keep appearing?
Your behaviour often tells you better where something should go than a perfectly drawn plan.
If you use your torch next to the sliding door every time, it probably belongs there. If you have to crawl under the bed for coffee supplies every morning, that storage is in the wrong place.
First make a complete inventory
Before organising permanently, gather all the things that should normally be in the van.
Divide them into categories:
- documents and safety
- everyday clothing
- spare clothing
- cooking and food
- water
- toilet and hygiene
- electronics
- tools
- sleeping
- wet and dirty items
- camping equipment
- dog supplies
- children's items
- sports or hobby equipment
Also write down how often you use each category.
A simple division works well:
Several times a day
Think of:
- keys
- phone
- water bottle
- coffee supplies
- jacket
- shoes
- toiletries
- charging cable
Daily
For example:
- clothing
- cooking pot
- cutlery
- towel
- rubbish bags
- water
- laptop
Occasionally
Such as:
- camping chairs
- extra supplies
- tools
- shower equipment
- larger cooking equipment
Only in emergencies
For example:
- first-aid kit
- warning triangle
- fire extinguisher
- spare fuses
- repair equipment
- spare parts
The more often you use something, the easier it should be to reach.
Work with clear zones
A fixed place works better when the entire van is divided into logical zones.
You do not need to build physical walls for this. It is mainly about grouping things according to where you use them.
The entrance zone
Near the sliding door, keep items you need when arriving or leaving.
Think of:
- shoes
- jacket
- keys
- dog lead
- torch
- rubbish bags
- towel for wet paws
- groceries that still need to be put away
This zone should be able to handle dirt and moisture.
A low plastic box for shoes, a few sturdy hooks and a small compartment for everyday items are often enough.
The kitchen zone
Everything for cooking and eating stays together.
For example:
- pot and pan
- cutlery
- plates and cups
- coffee and tea
- herbs and spices
- washing-up equipment
- basic dry supplies
- stove and lighter
You want to be able to make coffee without walking to three different sides of the van.
Keep daily cooking equipment close to the worktop. Reserve food and less-used items can be further away.
The sleeping zone
Around your bed, store only what you actually use there:
- sleepwear
- reading light
- phone charger
- earplugs
- possibly a bottle of water
- glasses
- small compartment for personal items
Do not put tools, food or dirty shoes next to your bed just because there happens to be space there.
Your sleeping zone stays more pleasant when it remains calm and relatively empty.
The clothing zone
Clean clothing, worn clothing, dirty laundry and wet clothing each get a different place.
A practical system:
- clean clothing in its own compartment or soft bag
- worn but still usable clothing on one hook or in one basket
- dry dirty laundry in a breathable laundry bag
- wet clothing in a ventilated drying zone
Without this division, everything ends up on the bed within a few days.
The technical zone
Battery, fuses, water pump, inverter, shut-off valves and charging equipment can be out of sight, but must remain accessible.
Provide a service hatch or removable panel.
A fixed place does not mean hiding your technical systems so well that you first have to dismantle your entire interior to replace a fuse.
The garage or deep storage
Under a fixed bed, mainly store larger or less frequently used items:
- camping chairs
- table
- tools
- reserve supplies
- cables
- sports equipment
- extra blankets
- maintenance equipment
Divide this space into a few clear categories. One large open space where everything is piled on top of each other almost always becomes a messy garage.
Give daily items the easiest places
The best storage places are usually:
- at easy reach height
- close to where they are used
- accessible with one hand
- without moving other items
- still usable when the bed is set up
Do not use these good places for equipment you only need once a month.
A common mistake, for example, is keeping everyday clothing deep under the bed while an easily accessible drawer is filled with spare cables and tools.
Turn that around.
Daily items close by. Reserve and emergency equipment further away.
Use the one-action rule
The more actions are needed to take or put back something, the more likely it is to end up lying around.
A bad fixed place might require:
1. removing a cushion
2. lifting the bed
3. pulling out a heavy box
4. opening the box
5. taking out a second bag
That may be acceptable for a spare part. Not for your underwear or coffee bag.
A good everyday place preferably requires only one or two actions.
For example:
- open a drawer and take the item
- open a door and hang up your jacket
- pull out a box and put in your shoes
Make putting things back at least as easy as taking them out.
Give small everyday items a landing spot
Keys, wallet, phone, glasses and loose coins cause a surprising amount of searching.
So provide one small fixed landing spot.
This can be:
- a shallow tray
- small wall pocket
- closed drawer by the door
- fabric organiser
- fixed bowl with a raised edge
Use this place consistently.
Do not put your keys on the kitchen counter today, under your pillow tomorrow and in a jacket pocket the day after. In a small space, something ten centimetres away can still seem completely lost.
Make sure loose items cannot fall out of the tray while driving. A closed compartment or box with a sufficiently high edge is safer.
Create a fixed departure spot
A separate place for items you need when leaving prevents a lot of stress.
Think of:
- car keys
- driving licence and documents
- phone
- sunglasses
- charging cable
- dog lead
- possible parking pass
- wallet
This place belongs close to the cab or sliding door, but should not be visible from outside.
That way, you do not have to search your entire van just before leaving.
Keep safety equipment accessible at all times
Safety equipment needs a fixed place before you even start thinking about decoration.
Think of:
- fire extinguisher
- fire blanket
- first-aid kit
- high-visibility vests
- warning triangle
- torch
- emergency hammer, if applicable
- CO alarm and smoke alarm
These items must not disappear behind heavy luggage.
A fire extinguisher under the bed is of little use if you first have to remove two bicycles and four boxes.
Choose a place that is:
- quickly accessible
- not easily blocked
- firmly secured
- still logical when the van is fully loaded
Heavy items belong low down
A fixed place should not only be practical. It must also be safe while driving.
Place heavy items as low as possible.
Think of:
- tools
- water
- large food supplies
- battery
- gas bottle
- heavy cooking pots
- spare parts
Light items such as clothing, towels and toilet paper can go in overhead cabinets.
This helps keep your van's centre of gravity low and reduces the chance of heavy items falling from above during an emergency stop.
Secure heavy boxes properly too. The fact that they fit exactly between two walls does not automatically mean they will stay in place during hard braking.
Distinguish between living mode and driving mode
Some items can be used loosely while parked, but must always return to their fixed driving place before departure.
Think of:
- laptop
- water bottle
- coffee mug
- phone
- table
- loose cushions
- cooking equipment
- dog bowl
- camping chairs
- toiletry bag
Make it clear where every loose item belongs while driving.
A good routine could be:
- laptop in padded cabinet compartment
- water bottles in fixed holders
- cooking pots in closed drawer
- table locked in place
- dog bowl empty and stored away
- loose cushions secured between bed and wall
This way, you do not have to think again every time about where everything can lie safely.
Doors and drawers must really close
In an officially registered camper, doors and drawers of storage spaces must remain closed during sudden manoeuvres.
Even apart from that formal requirement, it is simply basic safety.
So check:
- whether the latch is strong enough
- whether a full drawer does not open by itself
- whether doors cannot rattle
- whether boxes cannot slide out of their compartment
- whether open compartments have an edge or net
- whether heavy items are not above passengers
A small magnet may be enough for a light empty door, but not necessarily for a full kitchen drawer.
Test your storage during a short drive. Does anything rattle, slide or open? Then the fixed place is not ready yet.
Do not build a separate compartment for every item
It sounds organised to give every small item its own cut-out. In practice, this often makes your interior unnecessarily complex.
Things change. You buy a different phone, a larger cooking pot or a new torch, and suddenly the perfectly made compartment no longer fits.
So work with categories rather than every individual item.
For example:
- one box for charging cables
- one compartment for toiletries
- one drawer for kitchen utensils
- one bag for dog supplies
- one box for spare parts
Use small dividers only where they genuinely improve organisation, such as for cutlery, fuses or small tools.
A little flexibility makes your system more durable.
Use boxes that fit exactly in their compartment
Loose boxes are useful, but choose them before building the furniture permanently.
Measure:
- width
- height
- depth
- handle
- room to remove the box
- space needed for a lid
A box that technically fits exactly can still be impractical if there is nowhere to put your fingers or if the lid hits the bed.
It is better to choose a few uniform boxes than many different models. This creates more calm and makes replacement easier.
Use transparent boxes only if you like seeing the contents. Closed boxes look calmer, but may need a simple label.
Labels can help at the beginning
When your system is new, small labels are useful.
Not on every pair of socks, but on categories such as:
- kitchen reserve
- electricity
- maintenance
- winter equipment
- dog supplies
- dirty laundry
After a few trips, you will usually know where everything is naturally.
Use labels mainly in deep storage and technical zones. Daily places should be so logical that you barely need the label.
Deliberately leave one empty place
This may sound contradictory, but a good storage layout also includes empty space.
There are always temporary items on the road:
- groceries
- wet towel
- parcel
- jacket
- rubbish
- extra water
- something you bought along the way
If every cabinet and box is already completely full when you leave, everything that is added ends up on the bed or in the walkway.
So provide an empty box, shelf or temporary compartment.
That is not wasted space. It is a buffer for real life.
Create a temporary grocery spot
Groceries are one of the biggest causes of temporary clutter.
Provide a place where you can put a shopping bag without blocking the walkway. Then you can put everything away calmly.
This could be:
- free space under the table
- empty crate by the door
- section of floor in the garage
- open compartment in the kitchen
Do not put groceries loosely on the bed. Food packaging can leak, and the bed quickly becomes temporary storage for everything.
Dirty and wet items belong close to the door
Anything that brings mud, water, sand or smells should stay as close to the entrance as possible.
Provide fixed places there for:
- shoes
- wet jacket
- umbrella
- dog towel
- rain trousers
- rubbish
- wet hiking gear
Use materials that are easy to clean, such as plastic boxes and rubber mats.
With Grephar, I would create one fixed dog zone with his lead, harness, towel and poop bags. That way, I do not have to walk through the whole van with wet paws to search for a towel somewhere at the back.
Never keep wet items permanently in a closed compartment
A waterproof bag is useful for transporting wet clothing temporarily. It is not a good permanent storage place.
Take wet items out again when you arrive and let them dry with sufficient air circulation.
For example, provide:
- a hook under the roof hatch
- short washing line
- ventilation zone by the door
- temporary drying spot in the cab
Wet items therefore get a temporary fixed drying place and only then return to their normal storage place.
Make sure you can reach important items at night
When your bed is fully set up, the layout of your van changes.
Check whether you can still reach these things:
- keys
- phone
- torch
- water
- glasses
- shoes
- jacket
- toilet
- door
- fire extinguisher
- any medication
A drawer under a pull-out bed may be perfectly accessible during the day and completely blocked at night.
So always test your layout in sleeping mode.
Keep walkways clear
A fixed place should never be the reason your sliding door, rear door or access to the cab is blocked.
Avoid loose boxes in:
- doorways
- centre aisle
- in front of the driver's seat
- near pedals
- in front of technical service hatches
- in front of an emergency exit
Give every box or bag a place completely outside the walkway.
When you temporarily put something in the centre aisle, it should be an exception, not the standard solution.
Give charging cables one central place
Charging cables have a special talent for ending up everywhere.
Create one small electronics zone for:
- phone chargers
- USB cables
- laptop charger
- power bank
- adapters
- batteries
- memory cards
- router
Use cable ties or small pouches to keep them separate.
Keep important daily cables by the charging point. Spare cables can go in a separate technical box.
Do not take cables along if nobody knows which device they belong to.
Tools get one closed zone
Tools are heavy, hard and often dirty. They should therefore not be scattered among clothing and kitchen equipment.
Use one sturdy, low-mounted and well-secured tool box.
You can divide it into:
- hand tools
- electrical spare materials
- fastening materials
- tape and cable ties
- vehicle-specific parts
Keep the most essential items on top. You do not want to empty the entire box to reach a spare fuse.
Adapt the system to the season
Not everything needs to stay in your van all year round.
Create seasonal modules for, for example:
Summer
- swimming gear
- sunshade
- insect repellent
- light outdoor equipment
- cooling mat for dog
Winter
- extra blanket
- thermal clothing
- snow or frost equipment
- condensation cloths
- warm dog blanket
Keep equipment you do not need outside the season at home.
This keeps every fixed place usable instead of filling it with things you do not use for months.
Make a photo inventory of deep storage
In a large garage or hard-to-see compartment, a simple photo can be useful.
Put all boxes in their place and take a photo of the layout. Then you will later know:
- which box goes where
- what is at the back
- where technical access runs
- how everything needs to be loaded again
This is especially useful if you regularly remove modules.
Also keep technical diagrams and photos of cables and pipes separately with your documentation.
Use a fixed tidying order
Tidying up is faster when you always use the same order.
For example, after cooking:
1. put food back in the pantry
2. wash the cooking pot and cutlery
3. put cooking equipment in the fixed drawer
4. clean the worktop
5. check water and rubbish
Before leaving:
1. store loose electronics
2. close the kitchen
3. put clothing and shoes in their place
4. lock the table
5. safety check
6. walk around the outside of the van
A fixed order reduces the chance of forgetting something.
Do a short reset every evening
Even a perfect storage system gets overwhelmed if nothing is put back.
Take five minutes every evening to:
- sort clothing
- put shoes by the door
- store cables
- collect rubbish
- clear the kitchen
- set out keys and torch
- hang out wet items
This is not a major cleaning session. You are simply returning the van to its basic state.
In a small space, you feel the result immediately.
The one-in, one-out rule
Is a new permanent item coming in? Then see whether something else can go.
A new pan, jacket, chair or organiser also needs a place. Do not simply add it to the existing things.
This rule prevents your van from becoming a little fuller after every trip.
For consumables such as food or toilet paper, this is naturally less strict. But for permanent inventory, it works well.
Use the three-trip rule
After every trip, note which items came back unused.
A practical rule:
- unused for one trip: no problem yet
- unused for two trips: review critically
- unused for three trips: leave it at home from now on
Make exceptions for:
- safety equipment
- medication
- rainwear
- emergency tools
- legally required equipment
By regularly removing things, you keep fixed places genuinely usable.
Let everyone manage their own place
Are you travelling with several people? Give everyone their own personal zone.
For example:
- one clothing compartment
- one small daily box
- one hook
- one personal bag
This keeps everything from getting mixed together, and everyone knows where their own things belong.
With children, a coloured box of their own can be useful. With two adults, each person can use one side of a wardrobe or bench.
Shared items, such as kitchen equipment and tools, get a central shared place.
A simple system for a small van
In a compact van, I would not build too much separate furniture.
A practical basis could be:
- low shoe box by the sliding door
- two or three hooks
- one small everyday drawer
- one clothing bag per person
- kitchen box or compact kitchen unit
- a few uniform crates under the bed or bench
- breathable laundry bag
- central electronics bag
- fixed tool box
- one empty temporary crate
This keeps the system light and adaptable.
You do not need to build a wooden cabinet for every item.
A system for a larger van
In a larger van, you can create more fixed zones:
- kitchen drawers for daily equipment
- shallow wardrobe
- overhead cabinets for light items
- technical cabinet with service hatch
- garage with matching crates
- dirty zone by the door
- small personal compartments by the bed
- free temporary storage place
Do not automatically make cabinets deeper just because there is space. Shallow, organised storage often works better than huge compartments where things disappear.
When do you know a fixed place is well chosen?
A good fixed place usually meets these questions:
- Do I use this item in this zone?
- Can I reach it without moving something else?
- Can I put it back easily?
- Does it stay secure while driving?
- Is it also accessible in sleeping mode?
- Is it not in a walkway?
- Does the height suit the weight?
- Can the place handle dirt or moisture when needed?
- Does every traveller know where it belongs?
- Is there still some free space left?
If you have to answer no to several questions, the place is probably not right yet.
The biggest mistakes
Filling every empty corner
This makes you lose room to move and gives you even more stuff.
Hiding daily items deep away
They will eventually remain outside their storage place.
Not providing a place for worn clothing
The bed automatically becomes the clothes chair.
No temporary place for groceries
Then everything is in the walkway after every shopping stop.
Mixing wet and clean items
This quickly causes smells, moisture and frustration.
Testing only in daytime mode
Some compartments become completely blocked as soon as the bed is set up.
Putting safety equipment behind luggage
What you need in an emergency must be immediately accessible.
Using too many small organisers
Then you have to remember which of the twenty little bags contains something.
Leaving no empty space
Then every new item breaks your entire system.
A fixed place should feel logical
The best storage layout requires little memory.
Coffee is by the stove. Shoes are by the door. The phone charges by the bed or table. Tools are stored low and closed away. Wet items stay out of the sleeping zone.
You do not have to optimise everything down to the centimetre.
Start with clear zones, keep daily items close by and make putting things back easy. Then test a few trips and adjust wherever you keep searching or piling things up.
A fixed place is only truly successful when you still use it on a cold, wet evening when you are tired and want to sleep quickly.
If tidying up still takes little effort then, your system is working well.
Source: https://www.wegcode.be/nl/nieuws/uw-voertuig-laden-voor-vertrek~abekklzkxp
Source: https://www.wegcode.be/nl/regelgeving/1975120109~hra8v386pu