Lightweight building: how to avoid your van becoming too heavy?
A van conversion rarely becomes too heavy due to one giant mistake. Usually, it's dozens of small choices that accumulate. A slightly thicker floor. Heavy furniture panels. A large battery “just in case”. A full water tank. Metal drawer slides. An awning, bike rack, extra gas bottle, toolbox, and some other items that might come in handy someday.
By Laurens De Leeuw · 17 July 2026
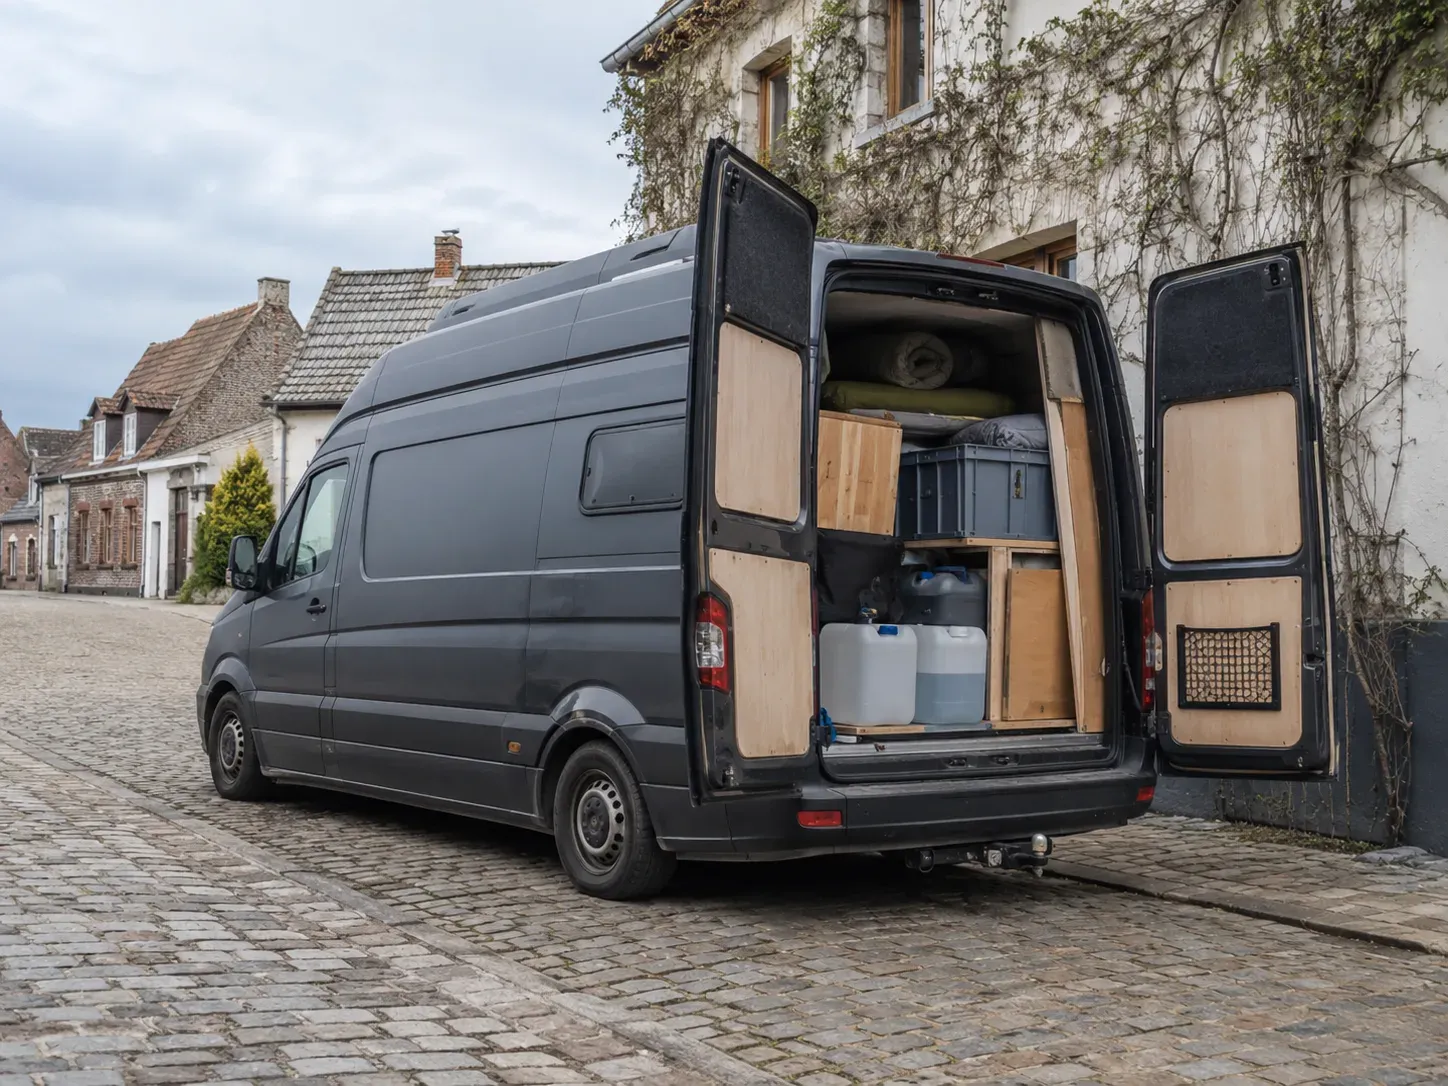
A van conversion rarely becomes too heavy due to one giant mistake. Usually, it's dozens of small choices that accumulate.
A slightly thicker floor. Heavy furniture panels. A large battery “just in case”. A full water tank. Metal drawer slides. An awning, bike rack, extra gas bottle, toolbox, and some other items that might come in handy someday.
Each component seems fine on its own. But when you add everything up, your van can surprisingly quickly approach its maximum permissible mass.
This is not just an administrative problem. An overloaded or poorly distributed van can steer, brake, and react differently in corners. Moreover, after the build, there must be sufficient payload capacity remaining for people, water, food, clothing, bicycles, and everything you take with you on the road.
Building light does not mean your van has to be fragile or bare. It means you build consciously: strong where needed, light where possible, and honest about what you truly use.
First, understand the most important weights
Before choosing materials, you need to know a few concepts.
MTM
MTM stands for maximum permissible mass. This is the maximum weight your vehicle is allowed to have when loaded.
This includes everything:
- the vehicle
- the complete conversion
- fuel
- water
- gas
- driver
- passengers
- luggage
- food
- bicycles
- tools
- dog supplies
- loose camping equipment
With a regular B driving license in Belgium, you are allowed to drive a vehicle with an MTM of up to 3,500 kg, within the other conditions of category B.
An important detail: the MTM is not a target weight. It is the upper limit.
So you don't want to leave with exactly 3,499 kg and hope you haven't forgotten anything.
Tare
The tare is the weight of the vehicle in a specific roadworthy condition.
For the official weighing of a converted camper van, Flanders takes into account, among other things:
- coolant and lubricating oil
- tools and spare wheel
- at least 90 percent fuel
- at least 90 percent drinking water
- at least 90 percent gas
- no driver
This is important, because a large water tank thus significantly contributes to the official determination of the tare. A 100-liter tank is not just an empty plastic container. When it is filled for at least 90 percent for weighing, approximately 90 kilograms of water are added.
Payload capacity
The payload capacity is what remains available after the tare for persons, luggage, goods, and additional equipment.
In its simplest form, you can think:
MTM − actual weight of the ready-to-travel van = remaining weight margin
For an official camper van, there are also specific minimum requirements for the payload capacity. For more recent vehicles, the Flemish calculation takes into account, among other things, the number of people and the length of the vehicle.
Simply “staying just under 3,500 kg” is therefore not always sufficient for a homologation file. Discuss the weight calculation in time with your technical service if you want to officially register the van as a camper van.
Axle load
Your vehicle not only has a maximum total weight. Each axle also has a maximum permissible load.
So you can stay under the total MTM and still overload the rear axle. This happens, for example, when you build a high bed at the back with:
- a large water tank
- batteries
- bicycles
- tools
- supplies
- a spare wheel
- heavy pull-out drawers
The total figure may still seem good, while almost all extra mass is at the back.
Therefore, weighing per axle is at least as interesting as just the total weight.
Weigh your empty van before you start
The best first step is not to rely on the weight you happen to find online. Have your own vehicle weighed.
Two seemingly identical vans can have different empty weights due to:
- engine version
- wheelbase
- height
- air conditioning
- tow bar
- double passenger bench
- spare wheel
- cargo area lining
- factory options
- existing racks or partition wall
Preferably weigh the van in a clearly documented condition.
For example, note:
- amount of fuel
- what is still in the cargo area
- whether the driver is on the weighbridge
- whether a spare wheel is present
- weight on the front axle
- weight on the rear axle
- total weight
Then you know where you are starting from.
A figure from a sales advertisement or database is useful as a first indication, but not a good basis for your complete building plan.
Calculate your real building budget
Suppose that after the first weighing, you still have a good margin up to the MTM. You cannot simply spend that entire difference on furniture and technology.
You must first reserve space for everything that will go with you later.
Think of:
- driver and passengers
- full fuel tank
- drinking water
- gas
- clothing
- food and drinks
- cooking equipment
- toiletries
- laptop and electronics
- tools
- camping chairs and table
- bicycles or sports equipment
- dog or children and their belongings
- waste and grey water
- purchases that are added along the way
Your actual building budget will therefore be:
MTM − current vehicle weight − weight of persons and travel equipment − safety margin
What remains after that, you can spend on the conversion.
With Grephar, for example, I would not only count his own weight, but also his water, food, blanket, harness, leashes, towels, and any crate. Individually, these items seem small, but together they do take up a significant part of your payload capacity.
Create a weight table
A simple spreadsheet is one of the most useful tools for a conversion.
Use at least these columns:
| Component | Estimated weight | Actual weight | Location in the van |
|---|---:|---:|---|
| Floor and finish | | | |
| Insulation | | | |
| Wall and ceiling panels | | | |
| Bed construction | | | |
| Mattress | | | |
| Kitchen unit | | | |
| Bench and table | | | |
| Storage cabinets | | | |
| Battery | | | |
| Inverter and chargers | | | |
| Solar panels | | | |
| Refrigerator | | | |
| Water tanks and pipes | | | |
| Gas installation | | | |
| Heating | | | |
| Windows and roof hatches | | | |
| Awning and roof racks | | | |
| Persons | | | |
| Luggage and supplies | | | |
| Bicycles or sports equipment | | | |
| Safety margin | | | |
Don't just fill in estimates. Replace them with actual weights during construction.
Many manufacturers state the weight of a product in the technical data sheet. For wood and sheet material, you can look at the weight per full sheet or per square meter.
Small components can be checked at home with a bathroom scale or luggage scale. It doesn't have to be accurate to the gram. The main goal is that you don't discover at the end that you have built a hundred kilograms heavier than expected.
Choose the base van based on payload, not just size
A larger van does not automatically have more payload capacity.
A long and high panel van usually weighs more when empty. A heavy engine, automatic gearbox, tow bar, double cab, or luxury equipment further reduce the available margin.
Therefore, when purchasing, compare:
- MTM
- actual empty weight
- technical mass of the front axle
- technical mass of the rear axle
- number of official seats
- body variant
- existing options
- desired vehicle category after conversion
A smaller base van with a good weight margin may be more interesting for your use than a large van that is already close to its limit when empty.
Don't just look at what fits in. Also look at what it is legally and technically allowed to carry.
Don't build the floor like a house floor
In some first conversions, a floor consists of so many layers that it almost becomes a construction project in itself:
- heavy wooden battens
- thick insulation
- full plywood sheet
- a second sheet
- underlayment
- heavy finished floor
- glue and sealant
That can be sturdy, but also heavy and unnecessarily high.
A good van floor must:
- be sufficiently strong
- be flat
- be able to support furniture
- withstand daily use
- insulate reasonably well
- not take up unnecessary height
More material is not automatically better.
Think in advance about where the load will actually be. A bed or cabinet construction can be locally reinforced without making the entire floor twice as thick.
Also pay attention to the finish. A light vinyl or other thin wear layer can weigh much less than heavy laminate or wooden floorboards.
Always compare the weight per square meter. On a complete floor, a small difference per square meter can quickly add up.
Use light wall and ceiling panels
Walls and ceiling together cover a large area. Therefore, a small saving per square meter has a big impact on the total.
Thick furniture panels are usually not necessary as wall cladding. A thin panel can function perfectly when sufficiently supported and correctly fastened.
Possible choices include:
- thin plywood
- light poplar plywood
- light composite panels
- local cladding instead of a double full wall
- fabric or other light finishes in suitable areas
Poplar plywood is generally lighter than birch plywood of the same thickness, although weight and quality vary per manufacturer. Therefore, do not only look at the type of wood, but at the technical data sheet of the specific panel.
Use heavier material where screws, hinges, or structural forces occur. Use lighter material where a panel is primarily for finishing.
An 18-millimeter panel is not needed everywhere
Beginners often choose one panel thickness and build everything with it. This is simple, but rarely the lightest solution.
For the same type of wood and the same surface area, a 9-millimeter panel weighs approximately half as much as an 18-millimeter panel. So you can save a lot by choosing material according to its function.
Think, for example, of:
- thicker parts for a load-bearing bed frame
- thinner side panels
- light cabinet doors
- local reinforcement blocks at hinges
- a frame construction with a thin skin
- cutouts in places where material carries nothing
You don't have to build a cabinet door as if someone should be able to stand on it.
Build with frames instead of solid boxes
Many pieces of furniture are built as fully enclosed boxes with thick panels on all sides.
This is easy, but heavy.
A light construction can consist of:
- a clever wooden or aluminum frame
- thin panels as side walls
- reinforcement only where forces occur
- open back where safe
- removable light bins instead of heavy drawers
A bed, for example, does not have to rest on four solid cabinets. A well-designed frame with a light slatted base can be at least as practical.
Note, however, that building light is not the same as building weak. Connections, attachment points, and driving safety remain important.
A thin panel that is well supported can be stronger and lighter than a thick panel that was poorly attached.
Avoid heavy household materials
Some materials are fine in a home, but less logical in a vehicle.
Think critically about:
- solid wooden countertops
- stone or composite kitchen countertops
- heavy MDF panels
- thick furniture panels
- ceramic tiles
- large metal drawer constructions
- heavy sinks
- decorative wall coverings without practical function
A thin, water-resistant, and well-finished countertop can function just as well on the road as a heavy kitchen countertop from a home.
The same applies to the sink. A small, light stainless steel basin usually does exactly what it needs to do. You don't need to copy a complete household kitchen into a van.
Keep your furniture design simple
Every extra cabinet brings more than just the panel you see.
You also need:
- side walls
- bottom
- shelves
- cabinet door
- hinges
- handle
- latch
- fastening material
- finish
For a drawer, heavy slides and a second inner box are added.
A cabinet with three drawers can therefore be much heavier than an open compartment with three light bins.
Ask yourself for each piece of furniture:
- Do I really need this?
- Can one cabinet have two functions?
- Can a fabric bag or plastic bin do the same?
- Does this need to be a drawer?
- Do I need a full back panel?
- Can I expand later if it proves really necessary?
A simple interior is not only lighter. It is also cheaper, easier to build, and more accessible for maintenance.
Cabinet doors are an easy place to save weight
Cabinet doors usually carry little weight. Yet they are often made from the same thick panel as the cabinet construction.
You can make them lighter with:
- thinner plywood
- a light frame with a thin panel
- a roller shutter or sliding panel
- a fabric closure
- elastic net
- open compartments with fixed bins
However, take driving safety into account. Open compartments above head height are only practical if the contents cannot come out during braking or a turn.
Building light should never mean that items fly loosely through the van.
Don't make the bed heavier than necessary
The bed is often one of the largest constructions in a van.
A fixed bed sometimes consists of:
- heavy beams
- thick plywood sheet
- fully enclosed cabinets
- heavy drawers
- thick mattress
- metal slides
That can quickly add up.
A lighter bed can work with:
- a sturdy but limited frame
- a slatted base
- thin panels where no great force occurs
- light storage bins
- fewer large pull-out drawers
- local reinforcement
- a mattress of appropriate but not exaggerated size
A slatted base also helps with ventilation under the mattress and can be lighter than a fully enclosed thick bed base.
With a pull-out bed, you need to be extra careful. Double frames, heavy drawer slides, and loose mattress parts sometimes make such a system heavier than a simple fixed bed.
So flexible does not automatically mean light.
Choose your mattress consciously
Mattresses also differ significantly in weight.
A thick, heavy household mattress can be comfortable, but requires more support structure and is harder to lift for ventilation underneath or access to storage.
Look at:
- actual weight
- thickness
- support
- ventilation
- moisture behavior
- whether you need to move it regularly
- sleeping comfort for your body
Saving on sleeping comfort is not smart. But bigger and thicker is not automatically better.
Test different solutions and don't buy based solely on appearance.
Water is one of the biggest weight factors
One liter of water weighs approximately one kilogram.
That makes water particularly easy to calculate:
- 20 liters is approximately 20 kilograms
- 50 liters is approximately 50 kilograms
- 100 liters is approximately 100 kilograms
Added to that are the tank, pump, hoses, fittings, and possibly a boiler.
So honestly ask yourself how much water you really need.
For short trips, loose jerry cans may be more interesting than one giant fixed tank. You can then only take what you need and easily fill or clean the jerry cans.
For longer trips, a fixed tank is more comfortable, but don't choose it just because the available space is large enough.
Think of:
- average daily consumption
- how often you can fill up
- whether you have a shower
- whether you stay at campsites
- number of travelers
- summer or winter use
- weight for homologation
- position relative to the axles
A huge tank that you usually use half-full is often primarily wasted space and extra system weight.
Don't forget grey water
Grey water also weighs.
If you start with 60 liters of fresh water and collect 40 liters in your grey water tank along the way, that weight is still on board. It has only moved from one tank to another.
When weighing your ready-to-travel van, you therefore need to look at the entire system.
Grey water tanks, toilet cassettes, and temporary waste storage also count.
Therefore, don't plan as if all consumed supplies magically disappear along the way.
Don't buy too large a battery “for later”
A house battery is one of the heavier technical components of a conversion.
First calculate your actual power consumption and then choose the capacity.
A small weekend van with lighting, phone, and an occasional water pump needs something different than a van with:
- refrigerator
- daily laptop
- router
- diesel heater
- induction hob
- heavy inverter
- electric water heater
An oversized battery not only means extra weight. It may also require:
- heavier cables
- larger fuses
- stronger charger
- larger inverter
- more solar panels
- sturdier mounting
Thus, one exaggerated choice can cause an entire chain of extra weight.
Lithium batteries are often lighter than traditional lead or AGM batteries for a comparable usable capacity, but they are more expensive and must be correctly chosen and installed. So compare not only amp-hours, but also usable capacity, weight, price, and compatibility with your charging installation.
The inverter determines more than you think
A heavy 230-volt inverter seems handy “just in case”. But a large device also requires heavy cables, fuses, and connections.
Ask yourself which 230-volt devices you actually use.
Perhaps your laptop, phone, lighting, and router can work directly on 12 volts or USB-C. Then you may not need a huge inverter.
The more you can do directly on 12 volts, the simpler and often lighter your installation becomes.
Induction, kettles, hair dryers, and coffee machines are not impossible, but they push the entire electrical system into a heavier category.
Solar panels and roof material also count
Various components often come together on the roof:
- solar panels
- mounting rails
- cable glands
- roof hatch
- fan
- awning
- roof rack
- roof box
- surfboard
- spare wheel
Not only the total weight counts. Weight high on the vehicle also affects the center of gravity.
So don't place a heavy roof rack because it looks cool if you hardly transport anything on it. A large metal rack can itself use a significant part of your roof load.
Always check the permissible roof load of your specific vehicle. This varies by model and version.
Preferably use the roof for light necessary components. Heavy luggage belongs as low as possible in the van.
An awning is handy, but not weightless
A fixed cassette awning is comfortable, especially in rain or sun. But it is also:
- heavy
- mounted high
- placed entirely on one side
- equipped with sturdy mounting brackets
For some travel styles, that is absolutely worth it. For others, a light tarp or loose sunshade is sufficient.
It's not about rejecting awnings. It's about making conscious choices.
Ask yourself how many times you will actually use it in relation to the weight you always carry.
Small hardware also adds up
Hinges, handles, and screws seem negligible. Yet all hardware together can form a noticeable weight.
Think of:
- dozens of heavy drawer slides
- metal table leg
- locks
- corner profiles
- mounting plates
- mounting rails
- bolts and nuts
- heavy handles
- curtain rails
- telescopic supports
You don't have to chase grams with every screw. But you can avoid every small cabinet being built with industrially heavy fittings.
Choose hardware according to the actual load.
A spice drawer does not need slides that can handle a hundred kilograms.
Glue, sealant, and finish are not weightless
A tube of sealant seems light. Twenty tubes, multiple layers of paint, wood oil, glue, and heavy floor coating do count.
Use enough product for a safe and durable build, but not automatically too much.
Thick glue beads do not improve a poor fit. Multiple decorative finishing layers add weight and work without always adding extra utility.
A neat, simple finish can be lighter and easier to repair.
Don't fill every free corner
Lots of storage space seems like an advantage. But empty cabinets rarely stay empty.
The more storage you build, the more items you are inclined to take with you.
That is the double trap:
1. the cabinet itself weighs something
2. then you fill it with extra material
Therefore, consciously leave some space free.
A van does not have to be able to transport everything you own at home. Choose material per trip and remove unused items afterwards.
A good storage system helps you take less with you. It is not intended to hide as much weight as possible.
Use light bins and soft organizers
Heavy wooden drawers are beautiful, but not necessary everywhere.
For clothing, towels, and light items, these alternatives can be more practical:
- fabric packing cubes
- light plastic bins
- storage bags
- elastic nets
- hanging compartments
- removable baskets
They weigh less and are often easier to remove from the van.
However, store heavy items in sturdy, enclosed, and well-secured compartments. A light fabric bag is fine for sweaters, not for heavy tools that can fly forward during an emergency stop.
Make components multifunctional
A light van preferably has as few components as possible that only have one task.
Examples:
- a bench with storage
- a tabletop that also serves as a work surface
- a bed frame that simultaneously protects technical components
- swivel front seats instead of extra loose chairs, if technically approved
- a step that is also a storage compartment
- a loose cooking box that can be used outdoors and indoors
- a bed section that becomes a backrest during the day
Multifunctional building only saves weight when the system remains simple. A complex mechanism with heavy rails and hinges can ultimately become heavier than two simple components.
So keep it logical.
Modular building can save weight
A modular interior allows you to only take what you need for a specific trip.
For example, for a weekend without bicycles, you don't need a large bicycle module. For a winter trip, you can take different storage than for a summer trip.
Possible removable components:
- cooking box
- extra water supply
- second battery module
- bike holder
- outdoor shower
- extra cabinet
- camping equipment
- sports equipment
However, pay attention to the official vehicle category and homologation. Removable does not automatically mean that a component falls outside the technical assessment.
But within a correctly designed base, modularity can prevent you from dragging unnecessary material around all year.
Heavy items belong low and central
Building light is important, but good weight distribution remains necessary.
Preferably place heavy components:
- low to the floor
- close to or between the axles
- not all against one side wall
- not all the way at the back
- firmly secured
Typical heavy components are:
- battery
- fresh water tank
- gas bottle
- refrigerator
- tools
- supplies
- bicycles
Also keep left and right in balance. A complete kitchen, water tank, battery, and overhead cabinets on the same side can cause the van to be visibly or noticeably unevenly loaded.
The best place depends on the original axle load of your base vehicle. An actual axle weighing provides much more insight into this than just a drawing.
Be careful with everything behind the rear axle
Weight placed far behind the rear axle puts extra strain on the rear axle and can simultaneously relieve the front axle.
This applies, among other things, to:
- bike racks
- tow bar boxes
- rear garages
- water tanks all the way at the back
- heavy pull-out drawers
- spare wheels on the rear door
You don't have to leave all the rear space empty, but it's better not to put a complete collection of heavy components together there.
A bicycle may not weigh extremely much, but a rack, two e-bikes, locks, and equipment together form a substantial mass at the end of your vehicle.
Weigh during construction, not just afterwards
A good construction plan includes multiple weighing moments.
Weighing 1: the empty base van
This way you know your starting point.
Weighing 2: after floor, insulation, and basic finishing
You see if the shell remains within the estimate.
Weighing 3: after furniture and technology
At this point, you can still relatively easily adjust material or eliminate certain luxuries.
Weighing 4: fully ready for travel
Weigh the van as you actually depart:
- fuel
- water
- gas
- driver and passengers, or their actual weight accounted for
- clothing
- food
- bicycles
- dog supplies
- tools
- camping equipment
If possible, also have the front and rear axles weighed separately.
An end weighing with empty water tanks, without people, and without luggage tells you little about the actual travel load.
Leave margin for real life
During construction, you might think your list is complete. But later, items almost always get added:
- extra blanket
- reserve water
- winter clothing
- groceries
- souvenirs
- larger tools
- second chair
- bicycle parts
- extra battery or solar panel
- dog or children
- unexpected repair materials
Therefore, don't leave only a symbolic margin of a few kilograms.
A practical van should be able to handle small changes without stress. You don't want to have to calculate before every supermarket stop whether a few bottles of water push you over the limit.
What if your van is already threatening to become too heavy?
Don't immediately start randomly removing small items. First, look for where the big gains are.
Step 1: weigh the van and the axles
Work with real numbers, not with assumptions.
Step 2: make a list of the heaviest components
Think of:
- water
- battery
- furniture
- countertop
- bed construction
- pull-out drawers
- roof rack
- awning
- bicycles and rack
- fixed equipment
Step 3: look for redundant double systems
For example, do you have:
- a fixed kitchen AND a complete outdoor kitchen?
- a large battery AND a power station?
- fixed water tank AND multiple reserve jerry cans?
- heavy table AND loose camping table?
- many tools for jobs you never do on the road?
Step 4: simplify furniture
Replace heavy drawers with bins, remove unnecessary back panels, or build lighter cabinet doors.
Do this without compromising structural safety.
Step 5: reduce supplies
Taking less water, food, and spare parts can help, as long as it fits your route. However, note that official homologation weighings have their own conditions.
Step 6: redistribute weight
A problem on the rear axle is not necessarily solved by removing light items from the cabin. Where possible, move heavy components further forward or to the other side.
The classic weight mistakes
“A big van can handle it”
Not necessarily. Look at the real technical figures.
“It's only a few kilograms”
Twenty choices of five kilograms together are one hundred kilograms.
“I'll weigh it when everything is finished”
Then the most expensive and difficult components are already installed.
“If it fits in the cabinet, it can come along”
Volume and payload capacity are two different things.
“Heavy panels are always stronger”
A cleverly supported thin panel can be lighter and more suitable than a thick panel without good design.
“I'll only fill the water tank halfway on the road”
That helps during some trips, but not necessarily for the official determination of the tare. Moreover, your system must be designed for the mass when the tank is full.
“I'm under 3,500 kg, so everything is fine”
Axle loads, payload capacity, and weight distribution also count.
My practical approach for a first conversion
If I were to start a first van conversion again, I would be strict with weight before I am strict with the finish.
I would:
1. Have the empty van weighed with sufficient fuel.
2. Determine the available margin.
3. First reserve weight for people and travel items.
4. Put every major component in a spreadsheet.
5. Compare sheet material based on kilograms per square meter.
6. Choose a simple floor and light wall cladding.
7. Build furniture with frames and thin panels.
8. Match water and battery capacity to actual use.
9. Place heavy items low and close to the axles.
10. Weigh again after each major construction phase.
11. Make a few trips first before adding extra cabinets and luxury.
12. Check the fully loaded van including axle loads.
That sounds less exciting than immediately building a beautiful kitchen. But it will give you much more peace of mind later.
A handy weight check before you buy anything
Ask yourself these questions for each major component:
- How much does it weigh exactly?
- Does that include mounting material?
- Is there a lighter solution?
- Do I use it often enough?
- Does it need other heavy components?
- Where will it be in the van?
- Which axle will it load?
- Can it be removed later?
- Do I lose payload capacity AND living space with it?
- Would I still choose this after ten trips?
Especially the question “what extra components does this need?” is important.
An induction hob itself may not weigh extremely much, but it may require a larger battery, inverter, cables, and charging equipment. A large water tank requires sturdier mounting and possibly a larger grey water tank. A heavy pull-out drawer requires a strong frame and heavy slides.
So look at the entire system, not just the main product.
Building light primarily means choosing consciously
A light van does not have to be primitive.
You can perfectly have a comfortable bed, decent kitchen, refrigerator, power, and sufficient storage without building everything like a home. The difference lies in the choices:
- the correct panel thickness
- a clever frame
- no unnecessary double walls
- simple technical systems
- limited water supply
- custom battery
- little heavy luxury
- multifunctional furniture
- regular weighing
The biggest gains usually don't come from drilling dozens of small holes in a furniture panel. They come from choosing large components correctly from the start.
Your payload capacity is part of your travel freedom
A van with sufficient weight margin travels more calmly.
You can do groceries without calculating. You can take water with you when the next filling station is uncertain. You can take winter clothing, bicycles, or a dog with you without immediately hitting the limit.
That is true practical freedom.
A van that is almost maximally loaded when empty can look beautiful but restricts you on every trip.
Therefore, don't build only for the day the conversion is finished. Build for the day when everything is actually on board: people, water, food, clothing, material, and a little clutter from real life.
Ultimately, building light is not about having as little comfort as possible. It's about retaining enough payload capacity to actually be able to use your van.
And that is much more important than another extra cabinet or a heavy countertop that mainly looks good in a photo.
Source: https://mobilit.belgium.be/nl/weg/rijden/rijbewijzen/belgisch-rijbewijs/personenwagen-categorie-b
Source: https://www.wegcode.be/nl/nieuws/uw-voertuig-laden-voor-vertrek~abekklzkxp
Source: https://www.politie.be/5415/vragen/verkeer/veilig-op-reis-met-caravan-of-kampeerwagen